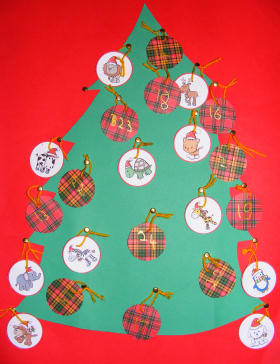
Diwali Crafts

Diwali Crafts

Diwali Door Hanging

At Diwali it is traditional to hang an embroidered door hanging, or toran, above doorways to welcome visitors and hopefully the Goddess of Fortune Lakshmi to your home. Make your own simple version from paper with the help of our printables.

You will need:

Printable pages – or your own version
Colouring pencils and pens

diwali_door_hanging

Instructions:

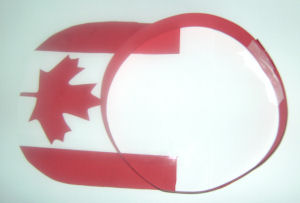
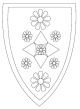
Print out three copies of your chosen “band” design (or our blank template, if you would like to do your own design) and colour them in. Print out three “drops” and again colour these in. The hangings are usually symmetrical.

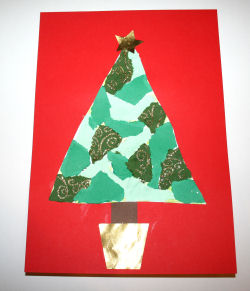
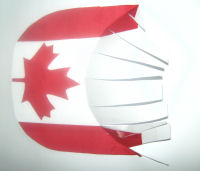
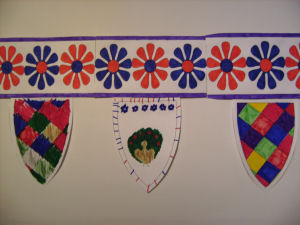
Cut out the three bands and tape them together along the back so they form one length. Cut out the drops and tape these along the bottom of the band as in the photo above.

Use sticky tack to stick the banner to the top of your door frame.

Blank band

toran_band_pattern

Blank band

toran_flowers


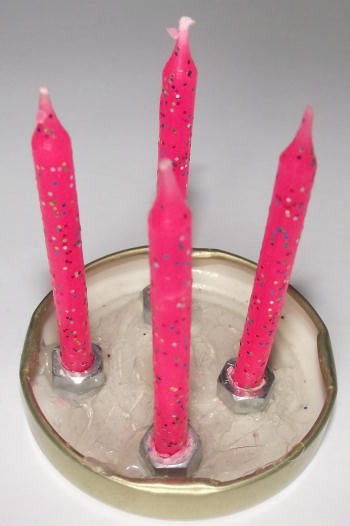
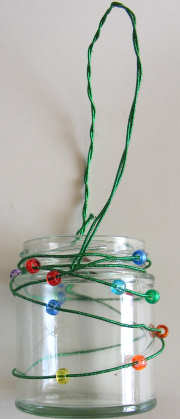
Beaded Candle Holder

When you light a tea light in this pretty beaded candle holder, no-one will guess that it is a recycled glass jar! Use pretty glass or plastic beads for a lovely stained-glass effect.

beaded-candle-holder

You will need:

A small glass jar Craft wire Beads

Instructions:

Wrap the wire tightly around the top of the jar. Make a loop of wire over the top of the jar to make a handle. Feed under the wire around the jar rim and pass back over to make another loop. Twist the two loops together.

beaded-candle-holder-detail

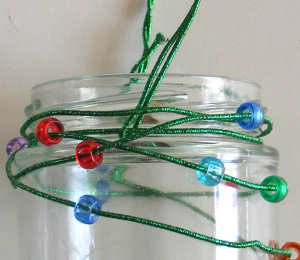
Feed some beads on to the wire, widely spaced out.

Twist the wire around the body of the jar. When you have wrapped around all of the wire, twist the end into the wire around the rim to hold everything in place.

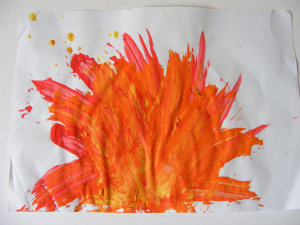
Coloured Sand Rangoli

You may be able to buy coloured rice for your rangoli projects. If not, coloured sand (available from craft stores) makes a good alternative. You can also die your own coloured salt, by simply mixing cheap table salt with food colouring and then spreading it out to dry.

coloured_sand_rangoli

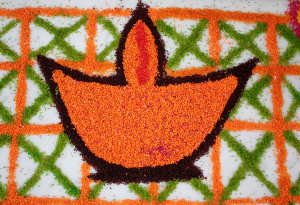
In traditional rangoli, the outline pattern is drawn on the floor and then filled in by carefully sprinkling coloured powders. Older children could try this technique directly on the ground with coloured sand or salt, having drawn their outline with chalk. Make sure they try this somewhere away from too much foot traffic, and easy to clean!

You will need:

Chalk for drawing a grid or outline
Newspaper to work on
Coloured rice, salt or sand
Large piece dark paper (black construction paper is ideal)
PVA glue
Optional – glitter

You may prefer to draw your outline on a piece of dark coloured paper and then fill in each section with white glue, sprinkling with sand or salt as you would with glitter. Do one colour at a time and shake the excess off onto a large piece of newspaper.

Children could use glitter in some areas of the design for contrast and emphasis.

Christmas Crafts

Christmas Crafts

Christmas Collage

Gather together an assortment of shiny materials, some glue and a crafty child, and see what they can put together!


You will need:

Assortment of card, papers, craft foam, fabric, felt, stickers, glitter – get out the contents of the craft cupboard! PVA or white glue and glue stick Felt tip pens

christmas_collage_2

christmas_collage_1

A Christmas collage is an excellent craft for a group of kids, as they can share materials between them and often become even more creative when they see what the other children are doing. I have also found that it is a wonderful activity for children who are not overly confident of their drawing / painting abilities. Any child is capable of putting together a stunning collage even if they really can’t draw! Sometimes providing simple shapes for them to fill in can help. For Christmas you could draw a tree, a star, bells or holly – or print out one of our Christmas templates.

Cup And Ball Santa Craft

Made using simple craft cupboard materials, this delightful Santa Christmas craft is sure to delight kids of all ages!

cup_and_ball_santa_craft

You will need:

Polystyrene ball
Paper cup
Pink paint
Red paint
Red and white felt
Small red pompom
White pompom
Wiggle eyes
Red, black and pink craft foam
Pink pen
Glue


Instructions:

Paint the ball pink and the cup red and leave to dry.Glue the ball to the bottom of the cup.

Cut two arms from red foam and two hands from pink. Glue one hand to the end of each arm and the other ends of the arms to the body.

Cut a strip of black foam and glue it around the middle of the cup as a belt.

Make a hat by rolling some fed felt into a cone. Glue the edge of the cone and glue the hat to the top of the ball. Cut a band of white felt and glue it around the edge of the hat. Add a pompom at the end of the hat.

Cut a beard from white felt and glue to the front of the face. Add a red pompom nose.

Finally, add two eyes and draw on a mouth.

Canada Day Crafts

Canada Day Crafts

Celebrate Canada Day this year by enjoying these Canada Day crafts with your children!

Canada Day Placemat

Your table will look great for Canada Day with these patriotic placemats, and the kids will enjoy helping you to make them! You could ask the children to sign and date them and then laminate them to keep them for next year, if you like.

You will need:

A sheet of white card
Red paper

Canada_day_placemat

Instructions:

Fold the card in half lengthways. Cut long lines in the card about 1 inch apart and about 1 inch from the edge of the card.

Cut the paper into strips about 1 inch wide. Take a strip of paper and pass it under the card and then up through the first slit, down through the second and back up through the third and so on until you reach the other side of the card. Push it up so it sits as close to the top of the red card as it can reach. Repeat with a second strip of paper, starting the other way, down through the first slit and up through the second and so on. Keep weaving until the card is full.

Laminating will protect your mat.

Canada Day Sun Visor

The perfect way to keep the sun out of your eyes at your Canada Day picnic!

Canada_Day_sun_visor

You will need:

Red card
White card
Glue stick
Sticky tape

Cut a strip of red card 1.5inches (3cm) wide and long enough to fit around your head. Measure it around your head and tape to secure.

From the white card, cut a rectangle approximately 8 by 6 inches (20 by 15 cm). Cut the corners at one end into curves. This is the front of your visor. Either draw your own or use our maple leaf template to cut a maple leaf out of red card. Glue it to the front of the visor. Either side of the maple leaf glue a rectangle of red card. Trim these to the edge of the visor.

To fit the visor to the band, put the band on top of the visor where you want it go and mark it’s position (see photo below).

Canada Day visor1

Now, from the back of the visor, cut slits up to the line to make tabs, as shown:

Canada Day visor2

Put the band back on the line and fold and tape the tabs to the inside. Trim any of the tabs that stick out. Glue securely, and wait until the glue dries before you wear your creation!

Bonfire Night Crafts

Bonfire Night Crafts

Celebrate Bonfire Night this year with some fun “firework” and bonfire crafts for your kids. Often children enjoy the idea of fireworks more than the actual fireworks themselves, which are a bit loud and scary! But we are sure they will enjoy sitting down to these firework activities.

And if the worst comes to the worst and you can’t get outside to enjoy a firework display, you can make some of your own with these crafty ideas!

 Bonfire Collage

Celebrate Bonfire Night with this wonderful collage bonfire collage.  It also makes a good campfire craft for summer.

bonfire_collage

You will need:

Large sheet of gold card
Glue stick
Yellow, red and orange tissue or crepe paper
Brown paper or card
Twigs
Sticky tape

Instructions:

Cut a bonfire shape from card.

Cut flames from the tissue paper and glue them to the card. Try not to glue them flat but bend them and only stick bits down to add texture and make the flames look more real.

From brown paper cut some rectangular “log” shapes and glue these to the bottom of the fire. Finish off by taping on some real twigs to bring the collage to life and add even more texture.

 Bonfire Painting

Here is a clever technique which will allow children to create a really effective bonfire painting for Bonfire Night or a campfire for summer

bonfire_painting

You will need:

Paper
Paint in yellow, red and orange
Tissues

Instructions:

Squirt some yellow paint at the bottom middle of the paper.

Scrunch up a tissue. Dip into the paint and use it to spread the paint outwards.

Repeat with orange and then red. Each time add a bit less paint so that it will not spread as far.

You will end up with a surprisingly effective bonfire painting for Bonfire Night!


Advent Crafts

Advent Crafts

Advent Wreath
Here’s an Advent Wreath with candles that is not only fun for kids to make but also safe to light each night in a house with children! Obviously children and candles are not the best combination but this is the safest advent wreath using real candles that I know. However, children should always be well supervised around candles.

You will need:

A large white tile
Acrylic paint pens
4 votive candle holders (baby food jars are a good stand by)
4 tea lights (you will need more than this if you intend to leave the candles burning for any length of time)

Instructions:

Draw your wreath pattern on the tile with the paint pens. In each corner draw a number from 1-4.

Decorate the candle holders with the paint pens.

When the paint is dry, put a candle in the holder on each corner.

In week 1 light candle 1 every night; in week 2 candles 1 and 2; in week 3, candles 1, 2 and 3, and in week 4 light all the candles.

Mini Advent Wreath Craft

Make this mini advent wreath craft and light the candles briefly during Advent, just like you would with a large advent wreath! Just be sure to supervise and don’t leave the candles burning unintended, unsupervised or for too long. Adult supervision required during the making, too, because of the hot glue gun.

mini_advent_wreath

You will need:

Jar lid
4 metal nuts (from the hardware store)
4 birthday candles
Strong glue/ hot glue gun

Instructions:

Make sure the nuts hold the candles tightly without wobbling.

Glue the nuts to the inside of the jar lid.

Push the candles into the nuts.

Christmas Tree Bauble Advent Calendar

This very simple advent calendar is perfect for small hands to turn over the pictures and looks very bright and cheerful on the wall.

christmas_tree_bauble_advent_calendar_1

Christmas Tree Bauble Advent Calendar
You will need:

Large sheet of green paper
Sheet of backing card
Glue
24 paper fasteners
24 card circles
Pens
Thread

Instructions:

Cut out a tree shape from the green paper and glue it to the backing card.

Make 24 holes in the tree . Push a paper fastener into each hole.

If you are using blank circles, decorate each with a picture on one side and a number from 1-24 on the other. If you do not want to draw the pictures you could cut them from old cards.

If you are printing our Christmas gift tags, cut them out and decorate the backs with a number from 1-24
Make a hole through each circle and thread a length of thread through, tying securely.

Loop each bauble around a paper fastener.

Each day turn the appropriate bauble around to show the picture.